Openshift is a fantastic Polyglot PaaS from Redhat, and you can do a lot of things with these containers. The good news is that with free accounts, OpenShift gives three gears for free, forever. Today, in this article I will show you how to install and run your Symfony applications in OpenShift.
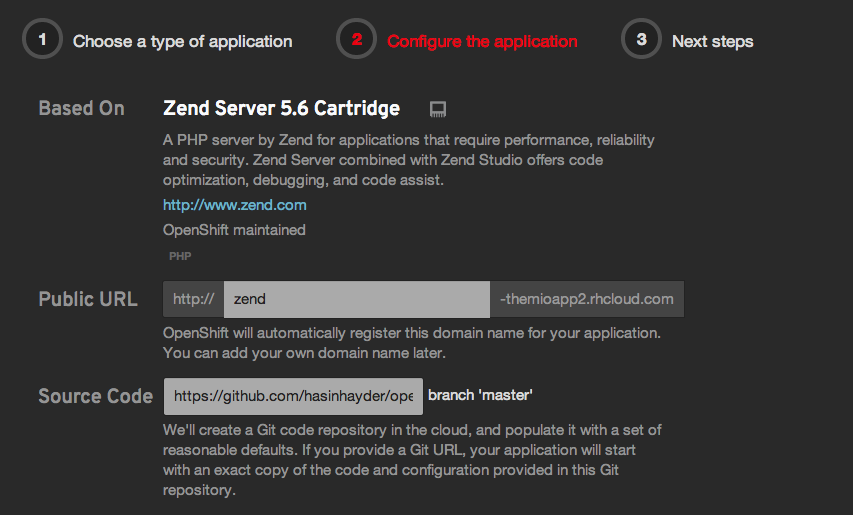
After you have created your free account in OpenShift, go to the applications page and create a new “Zend Server 5.6” application. You can choose “PHP 5.3” containers as well, but there are many benefits of choosing ZendServer.
Before we dive into the details, please MAKE SURE that you have added your public key in your openshift settings section. This is very important that you do this.
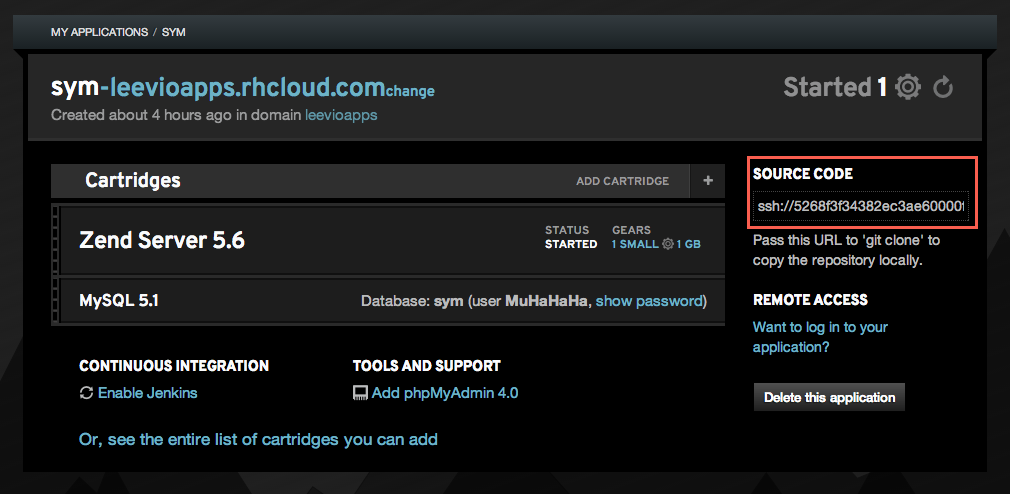
So after creating the new ZendServer 5.6 application and adding our public key in our OpenShift account, this is time to check out from our application’s git repository. OpenShift gives you a private git repository for every application and you can find the url in the right side of your application details.
Now, follow these steps to check out this git repository and create a blank symfony application inside it’s php directory. You should have composer installed in your machine before this step.
[sourcecode language=”shell”]
git clone ssh://[email protected]/~/git/sym.git/
cd sym/php
rm -fr *.php
composer create-project symfony/framework-standard-edition ./
[/sourcecode]
After it runs, you have a blank symfony project installed inside this php directory. Now you need to add these files and commit in the git repository
[sourcecode language=”shell”]
git add -A
git commit -am "Blank Symfony Project"
git push
[/sourcecode]
OpenShift has an auto deployment feature which will deploy your application code after you push it in the git repo. It makes the deployment a lot easier for everyone.
Now you can visit your openshift container’s url but hey, why there is a blank screen? To find the answer of this question you need to open the .gitignore file. By default it’s content is like this
[sourcecode language=”shell”]
/web/bundles/
/app/bootstrap.php.cache
/app/config/parameters.yml
/app/cache/*
/app/logs/*
/vendor/
!app/cache/.gitkeep
!app/logs/.gitkeep
/build/
/bin/
/composer.phar
[/sourcecode]
Notice those lines “/app/config/parameters.yml” and “/vendor/”? These lines mean that parameters.yml file and everything in the vendor folder will be excluded from your commit. For now, just remove the line where it says about parameters.yml and keep the vendor line as is. So your final .gitignore file will look like this
[sourcecode language=”shell”]
/web/bundles/
/app/bootstrap.php.cache
/app/cache/*
/app/logs/*
/vendor/
!app/cache/.gitkeep
!app/logs/.gitkeep
/build/
/bin/
/composer.phar
[/sourcecode]
Now come to the root of your openshift repo and give this commands in the terminal
[sourcecode language=”shell”]
git add -A
git commit -am "Parameters.yml"
git push
[/sourcecode]
Now we need to setup the database details. To get those credentials, you need to log into your openshift gear. You can find the ssh login details in the right side of your app settings. In the following screenshot, you can get the mysql details (username and password) and ssh login details from the right side “Remote Access” section. Just click on the “Show Password” and “Want to login” links.
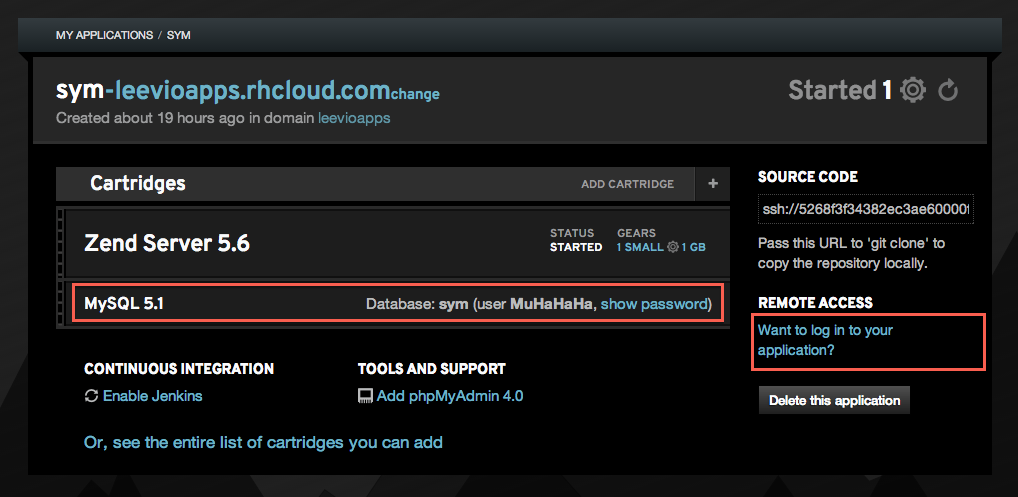
After you get the Remote Access , log into your openshift gear from your terminal. Once you are logged in, type the following commands in the terminal.
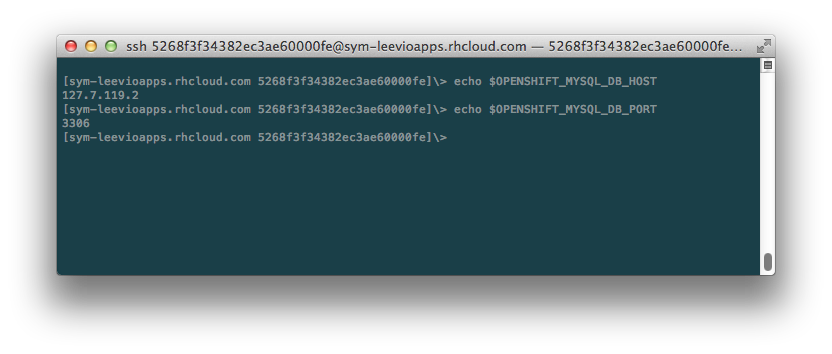
Copy the values of mysql db host and port. Now we have all the data for our symfony app. Open your parameters.yml file and put all the essential data. For my one, it looks like this
[sourcecode language=”shell”]
parameters:
database_driver: pdo_mysql
database_host: 127.7.119.2
database_port: 3306
database_name: symfony
database_user: MuHaHaHa
database_password: "4s89-vh55G6q"
mailer_transport: smtp
mailer_host: 127.0.0.1
mailer_user: null
mailer_password: null
locale: en
secret: WhateverYouLikeTo
[/sourcecode]
Now commit this file and push
[sourcecode language=”shell”]
git commit -am "Parameters"
git push
[/sourcecode]
At this point, we need to write a deploy hook which will do the following things everytime you push your code.
- It checks if composer is installed in our openshift gear. If not, it installs it
- It then go to $OPENSHIFT_REOP_DIR/php folder and run composer install command
- Then it gives write permission to app/cache and app/logs folder
Open your openshift repo, go to the .openshift folder, then go to the action_hooks folder and create a new file named deploy. Inside that file, put the following content
[sourcecode language=”shell”]
#!/bin/bash
# .openshift/action_hooks/deploy
export COMPOSER_HOME="$OPENSHIFT_DATA_DIR/.composer"
if [ ! -f "$OPENSHIFT_DATA_DIR/composer.phar" ]; then
curl -s https://getcomposer.org/installer | /usr/local/zend/bin/php — –install-dir=$OPENSHIFT_DATA_DIR
else
/usr/local/zend/bin/php $OPENSHIFT_DATA_DIR/composer.phar self-update
fi
unset GIT_DIR
cd $OPENSHIFT_REPO_DIR/php
/usr/local/zend/bin/php $OPENSHIFT_DATA_DIR/composer.phar install
chmod -R 0777 $OPENSHIFT_REPO_DIR/php/app/cache
chmod -R 0777 $OPENSHIFT_REPO_DIR/php/app/logs
[/sourcecode]
As a sidenote, if you are using regular PHP 5.3 containers instead of ZendServer 5.6, then replace “/usr/local/zend/bin/php” with “/usr/bin/php” in the deploy script above.
Save this file and give it executable permission by following command from your terminal
[sourcecode language=”shell”]
chmod +x deploy
[/sourcecode]
Now come to the root of your openshift repo and commit this deploy file. OpenShift supports different git hooks and you can check out https://www.openshift.com/developers/deploying-and-building-applications to know more about those.
[sourcecode language=”shell”]
git add -A
git commit -am "Deploy Hook"
git push
[/sourcecode]
You will notice some magical things happening at this point. After you push, you will notice in your terminal that composer is being installed in your openshift gear, and then it runs the composer install in appropriate directory.
Now visit your optnshift url (url/web/app_dev.php). Strange! now it is showing a strange error that we don’t have access to this app_dev.php. To fix this, open our app_dev.php (openshift repo/php/web/app_dev.php) and comment out line #12 to #18, I mean comment the following lines in your app_dev.php.
[sourcecode language=”php”]
//php/web/app_dev.php
if (isset($_SERVER[‘HTTP_CLIENT_IP’])
|| isset($_SERVER[‘HTTP_X_FORWARDED_FOR’])
|| !in_array(@$_SERVER[‘REMOTE_ADDR’], array(‘127.0.0.1’, ‘fe80::1’, ‘::1’))
) {
header(‘HTTP/1.0 403 Forbidden’);
exit(‘You are not allowed to access this file. Check ‘.basename(__FILE__).’ for more information.’);
}
[/sourcecode]
Sweet, now visit your openshift gear’s url (url/web/app_dev.php) and you can see that symfony is running smoothly :). But wait a minute – the URL contains the “web” part which looks ugly. All openshift PHP gear’s document root is set to $OPENSHIFT_REPO_DIR/php folder, which is in this case the root of our symfony application. But we don’t want this “web” in the URL. To do that, just create a .htaccess file in the “php” directory in our local openshift repo and put the following content
[sourcecode language=”shell”]
#php/.htaccess
RewriteEngine on
RewriteCond %{HTTP_HOST} ^your-openshift-domain$ [NC,OR]
RewriteCond %{REQUEST_URI} !web/
RewriteRule (.*) /web/$1 [L]
[/sourcecode]
And we are done, visit your openshift URL (url/app_dev.php) and it will working like a charm. So what if we want to set this app_dev.php as the default endpoint for our application? which means that we don’t even need to put “app-dev.php” in our url. To do that, open the .htaccess file from your “web” folder and replace all instance or “app.php” and “app\.php” to “app_dev.php” and “app_dev\.php” respectively. Then save your repo and make a git push and you are done! Tada!!!!
Hope you’ve enjoyed this long article. 🙂
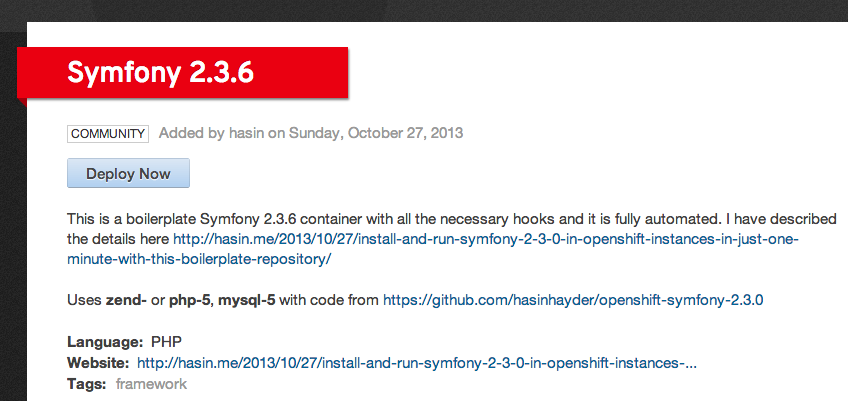
Followup: I have automated the whole process and created a boilerplate Symfony 2.3.0 repository. Now you can get up and running in just one minute. Check out http://hasin.me/2013/10/27/install-and-run-symfony-2-3-0-in-openshift-instances-in-just-one-minute-with-this-boilerplate-repository/
Shameless Plug
Did you check our latest Onepage parallax portfolio template in Themeforest?
