Tag: hook

Remote deploy your project using git's server side hooks

6Icr9fARMmTjTHqTzK8z_DSC_0123
Git hooks are very useful to perform tasks during different states of the codebase. Sometime you can cancel your commit if jshint throws some error on your javascript files, or you can deploy your current working directory somewhere in the server. In this article we will be discussing how to deploy code using git’s server side hooks.

Step 1: Add a git repository somewhere in your server
Create a blank git repository somewhere in your server. For example, see the following code

[sourcecode language=”shell”]
cd /path/to/your/folder
git –bare init myrepo.git
[/sourcecode]

You will see that a new directory named myrepo.git has been created. Inside that folder you will find a few other folders named “hooks”, “branches” and so on. However, sometime, this command may give you unexpected result by creating those child folders outside the myrepo.git. In that case the following commands are helpful

[sourcecode language=”shell”]
cd /path/to/your/folder
mkdir myrepo.git
cd myrepo.git
git –bare init
[/sourcecode]

Now everything will be inside this myrepo.git folder. Lets move to the next step.

Step 2: Add this newly created git repo as a remote to your current project
This part is easy, just follow these commands from inside your current project. We are going to add the repository we created in step 1 as a remote named “server”

[sourcecode language=”shell”]
cd /your/current/project/directory
git remote add server ssh://user@serveraddress/path/to/your/folder/myrepo.git
[/sourcecode]

Once added, you can push to this git repo like you did with origin, like
[sourcecode language=”shell”]
git commit -am "Some Commit Message"
git push server master
# (or simply git push server)
[/sourcecode]

You may want to add your local machine’s public key in the ~/.ssh/authorized_keys file so that you won’t have to input username and password every time you push your code.

Step 3: Add the git hook
To deploy your code after a push, we need to deal with post-receive hook. Log into your remote server and go to the repository that we had created in step 1 (i.e /path/to/your/folder/myrepo.git). Now go to the hooks directory and create a file named post-receive. If you want to deploy your code to a directory accessible by web server, for example /usr/share/nginx/www/myproject then the code of post-receive will be like this

[sourcecode language=”shell”]
#!/bin/bash
export GIT_WORK_TREE=/usr/share/nginx/www/myproject
git checkout -f
[/sourcecode]

The code above will checkout current HEAD of master branch inside the directory specified by GIT_WORK_TREE. But sometime, you may have another project which is cloned from your git repo. In those directories, instead of checking out, we will do a git pull. So our post-receive file’s code will be like this

[sourcecode language=”shell”]
#!/bin/bash
cd /usr/share/nginx/www/myproject
unset GIT_DIR
git pull
[/sourcecode]

remember to unset GIT_DIR which is very important for a git pull from post-receive hook.

Step 4: Give the executable permission to this post-receive hook
In this last step, just give executable permission to this post-receive file and you’re done
[sourcecode language=”shell”]
chmod +x /path/to/your/folder/myrepo.git/hooks/post-receive
[/sourcecode]

That’s mainly it 🙂 Now whenever you push your code from local machine to this remote git repository, your code will be deployed instantly.

I hope you’ve enjoyed this article and I would love to hear your comments.
Install and Run Symfony 2.3.6 projects in OpenShift instances in just one minute with this boilerplate repository

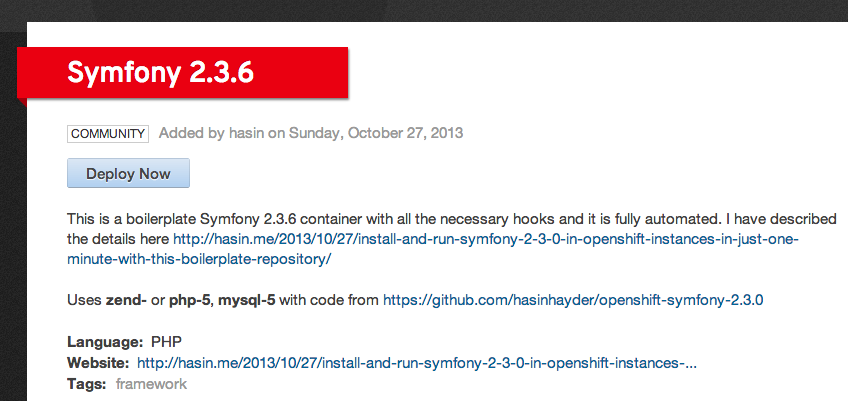
Okay, I have written an article 2 days ago where I went through every details. But today. I have created a blank symfony container with all the necessary deploy hook and mods so that you can get your symfony 2 project up and running in an openshift container within a minute, fully automated, seriously!

Github Repo: https://github.com/hasinhayder/openshift-symfony-2.3.0

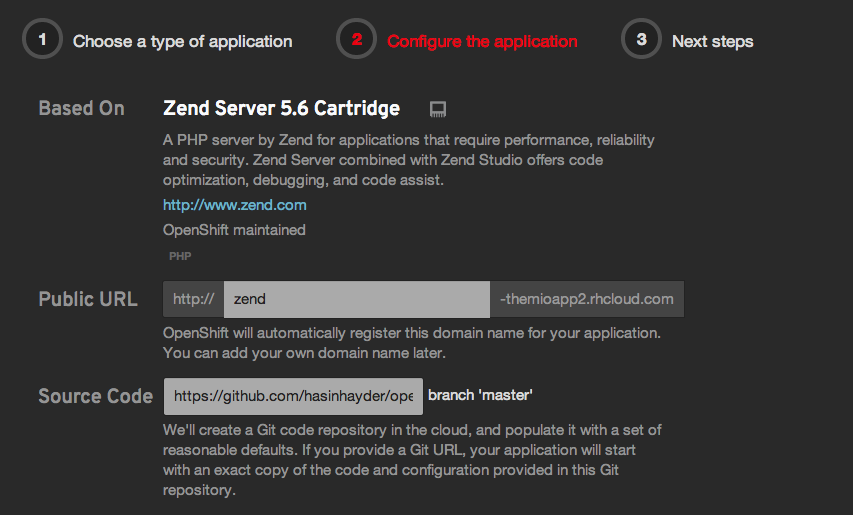
Just create a new ZendServer 5.6 or PHP 5.3 gear from your OpenShift control panel and while creating, supply this git repository’s checkout URL (https://github.com/hasinhayder/openshift-symfony-2.3.0) in the “Source Code” field. That’s it. And oh by the way, don’t forget to add a MySQL cartridge later in this gear. You don’t have to do anything else at all! The deploy script will take care of everything.

howtouseit

Here’s a quicktip just for the first time ssh login. You may not have to do it at all, but if by any chance you cannot connect to mysql database from app/console then all you need to do is clear the cache and you are done 🙂

[sourcecode language=”shell”]
cd $OPENSHIFT_REPO_DIR/php
php app/console clear:cache –env=dev
[/sourcecode]

Now Symfony can be installed in just one minute in your openshift instances. Enjoy!

By the way, if you are wondering how did I manage to load OpenShift MySQL credentials automatically in the container, then open the app/config/config.yml and you will notice that I have imported a new file named “params.php” from the same directory

[sourcecode language=”shell”]
# app/config/config.yml
imports:
– { resource: parameters.yml }
– { resource: security.yml }
– { resource: params.php }
[/sourcecode]

and in the app/config/params.php I have added these lines which injects the database parameters in the container with appropriate value

[sourcecode language=”php”]
<?php
# app/config/params.php
$container->setParameter(‘database_host’, getEnv("OPENSHIFT_MYSQL_DB_HOST"));
$container->setParameter(‘database_port’, getEnv("OPENSHIFT_MYSQL_DB_PORT"));
$container->setParameter(‘database_name’, getEnv("OPENSHIFT_APP_NAME"));
$container->setParameter(‘database_user’, getEnv("OPENSHIFT_MYSQL_DB_USERNAME"));
$container->setParameter(‘database_password’, getEnv("OPENSHIFT_MYSQL_DB_PASSWORD"));
?>
[/sourcecode]

Update: This repo is now a part of OpenShift Quickstarts and you can directly access and instantly deploy it from here https://www.openshift.com/quickstarts/symfony-236, as well as from PHP Section in your OpenShift app control panel

Screen Shot 2013-10-28 at 10.41.08 PM

jQuery:hooking form submit and making it ajax request

modern javascript frameworks are big blessings to every front end developer. they made our life so much easier so that we can sleep more and become fat day by day 😀 – i am a big fan of jQuery and mootools.

in this post i am going to show you how you can hook a normal form submission process, regardless of it’s method GET or POST, and convert it into an ajax request. the whole process will work dynamically. it will parse form input elements, make a JSON array from them and make an ajax request to the appropriate action url. after that, it will invoke the user supplied callback function.

problem 1: parsing form elements was a small challenge. you can do it in various way (by traversing or serialize or using css selectors). i choose to use serializer routines. jQuery has builtin support for two types of serializing , one is $(form).serialize() and another is $(form).serializeArray(). lets have a look at the output of both of them for the following form

[sourcecode lang=”html”]
<form id="f1" action=’some target’ method=’POST’>
<input type ="textbox" id=’username’ name =’username’ value=’me’/>
<input type ="checkbox" value=1 id=’guests’ name =’guests’/>
</form>
[/sourcecode]

now lets check the output by both serialize() and serializeArray() method

[sourcecode lang=”javascript”]
alert ($(‘#f1’).serialize());
//output is "username=me&guests=1"

alert($(‘#f1’).serializeArray()
//output is [{object},{object}]
[/sourcecode]

are you scared seeing this [object] output of serializeArray()? well dont panic. serializeArray() returns a JSON structure. you can still investigate using toSource() method

[sourcecode lang=”javascript”]
alert($(‘#f1’).serializeArray().toSource()
//output is [{"username":"me"},{"guests":"1"}]
[/sourcecode]

but that will not be usable to send in our AJAX request. we need a JSON array key/value pair (or you can use the output of serialize() function too to send as data in ajax request, the serilizeForm part is completely optional )

lets create a new function called serializeForm which will create JSON key/value pair out of serializeArray() and do the rest of the work.

[sourcecode language=”javascript”]
$.fn.serializeForm = function()
{
data = {};
url = this.attr("action");
items = this.serializeArray();
$.each(items,function(i,item)
{
data[item[‘name’]]=item[‘value’];
}
);
return data;
}
[/sourcecode]

now lets hook the normal submit process of the form using the following hook

[sourcecode lang=”javascript”]
function submitHook(form, callback)
{
$(form).submit(function(e){
items = {};
items = $(form).serializeForm();
url = $(form).attr("action");
if(""==url)
{
alert("Cannot submit form. No action specified");
return false;
}
callback = callback?callback:function(){};
$.post(url,items,callback);
return false;
});
}
[/sourcecode]

now you can just hook the form simply by this

[sourcecode lang=”javascript”]
ourCallback = function (data)
{
alert(data);
}

submitHook($(‘#f1’),ourCallback);
[/sourcecode]

happy jQuerying 🙂