Category: PHP

A helpful Twig extension – Fetch

twig

Inspired by Symfony’s twig extension to fetch output from external controllers and URL’s in their Twig subsystem, I wrote this small Twig function which you can use in your general twig templates. The main purpose of this extension is to fetch external URL (via GET or POST). You can also pass an arbitrary number of parameters which is helpful while fetching external URL via POST.

Here is the code of the Fetch extension.

https://gist.github.com/hasinhayder/9705763

To use this newly created extension, initialize your Twig loader in this way

[sourcecode language=”php”]
//include the twig extension file first

$loader = new \Twig_Loader_Filesystem(__DIR__ . "/../app/twig"); //change accordingly
$twig = new \Twig_Environment($loader);
$twig->addExtension(new Fetch());
return $twig;
[/sourcecode]

And then you can simply call it in your twig files in this way

[sourcecode language=”php”]
{{ fetch("http://yourdomain.tld") }}

//or

{{ fetch("http://yourdomain.tld", {‘param1′:’value1′,’param2′:’value2’}) }}
[/sourcecode]

And you’ll notice that the output from the URL is now fetched and displayed in your twig output πŸ™‚

Hope you enjoy this πŸ™‚

SupportX – A rich support app-theme for Envato Authors built using WordPress

01_supportx_preview.__large_preview (1)
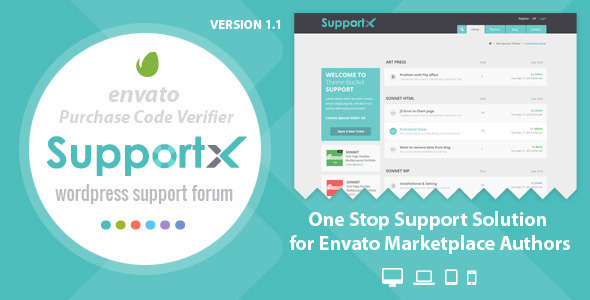
Last week, we have developed SupportX, a beautiful support theme based on WordPress. SupportX is built specially for the Envato marketplace authors where it’s a tedious job to provide proper support to the buyers of their product. It comes with a handful of useful features like SMS notification, live notification feed, purchase code verification and Knowledge base, and it doesn’t require to install external plugins like bbPress to use SupportX.

For $45, I must say that it’s a real bargain. You can purchase SupportX from Themeforest by going to this linkΒ http://bit.ly/1o90Wvc

With 1.1GB/s IO, Ramnode is possibly one of the best VPS providers out there

When you search for low end boxes, you may think that services are not up to the mark with these providers. Guess what, You are WRONG, so WRONG indeed. There are a few providers who gives you a top class services, despite their price point.

Ramnode

I have been using Ramnode for almost 6 months by now, had used Rackspace and Amazon EC2 before and I am not a big fan of them except the instant resource modification feature. When I purchased my first box from Ramnode, I was just thinking let’s give a try. And once I started, I totally loved their services. From 1Gbit network to an amazing RAID10 setup that gives you upto 1.3 GB/s in SSD and 800MB/s in SSD Cached VPSes. Here is the result of dd test in one of my SSD boxes.

[sourcecode language=”shell”]
d if=/dev/zero of=iotest bs=64k count=16k conv=fdatasync && rm -rf iotest
16384+0 records in
16384+0 records out
1073741824 bytes (1.1 GB) copied, 1.01694 s, 1.1 GB/s
[/sourcecode]

and here is the result from one of my SSD cached boxes

[sourcecode language=”shell”]
dd if=/dev/zero of=iotest bs=64k count=16k conv=fdatasync && rm -rf iotest
16384+0 records in
16384+0 records out
1073741824 bytes (1.1 GB) copied, 1.37957 s, 778 MB/s
[/sourcecode]

Ramnode has been a great provider to many people out there for last 2 years, and several time won the quarterly poll arranged by LEB community. Give it a shot anytime without worrying much, you won’t be disappointed. And beside enjoying such a great servcie, enjoy an additional discount of 38% by using the coupon code WOWNUM1 for any of their plans.

Integrate Social Sign On in your PHP apps using HybridAuth

nt.social.network.big_

Integrating social sign-ons in a web application can become a tedious task because you need to take care of different endpoints, credentials and finally manage the oauth dance to get the access token. However, using HybridAuth package, this task can be easy as pie πŸ™‚ Let’s have a look

In this example I will show you how to connect to Facebook and Twitter using HybridAuth. So you need to create two applications in Facebook and Twitter each. Save those app’s id and secret somewhere because we will need that in a minute.

Step 1: Install the Package via Composer

Composer is an excellent package manager for PHP apps. Let’s use that to install HybridAuth in our current projects scope. Add a composer.json file in your project path, or update it with the following contents if it already exists. But before that, make sure that you have composer installed in this machine.

[sourcecode language=”javascript”]
{
"require": {
"hybridauth/hybridauth": "3.0.0.*@dev"
}
}
[/sourcecode]

now run the following command to install hybridauth

[sourcecode language=”shell”]
composer install
[/sourcecode]

Step 2: Connect with Facebook

Let’s make a good use of this HybridAuth. This time we need to create two files, fb.php and hybrid.php. Make sure that your facebook app’s callback url points to this hybrid.php. FOllowing is the code of fb.php (more…)

Automated Rsync – without compromising security

Rsync is one of the most popular tools to synchronize data between two computers, and used mostly in taking backups using this sync feature. It’s easy to use and only uploads the changed files when a sync is necessary, so it’s effective in saving bandwidth and time too. To run rsync, you need root or a properly privileged user which can access that specific path in the remote machine. And to setup this privilege, you can either use a should-never-be-used root account or an user chrooted using a jail shell. But if, by any chance, current machine is compromised then remote machine is compromised too. Because anyone can connect to your remote machine using those credentials from the current machine. To avoid plain text credentials (or the credentials written in a shell script), people usually use ssh keys to establish a connection between two machines. Still, your remote machine is unsecured if anything goes wrong in the current machine from where you’re taking the backup.

So a fullproof solution is to use ssh keys and properly chroot the remote user so that it can only access the backup files and nothing else. However, setting up a jailed shell is a not-for-everyone type task and takes time and experience to accomplish properly. So here is a quick work around that you can implement in your remote machine to prevent the connecting user from doing anything malicious but only tasks those are needed to perform the rsync backup. Let’s see how we can do that

Before continuing, let’s name our two machines. The one which should be backed up, lets name that Workstation. And the one which is storing the backups is BackupServer. Also for now, let’s assume that you are backing up complete “/var/www” folder in the WorkStation.

Step 1: Create SSH key in the BackupServer
Log into the BackupServer and run the following command in ssh terminal. But remember, if you already have a key in ~/.ssh/id_rsa.pub then IGNORE IGNORE IGNORE this step.

[sourcecode language=”shell”]
ssh-keygen -t rsa
[/sourcecode]

It will prompt for a passphrase, REMEMBER to just hit the enter without typing anything.

Step 2: Display and Copy the SSH key from BackupServer
Run the following command to display the ssh public key in the terminal, and then copy it.
(more…)

BucketAdmin – Our new dashboard for your next web application

01_bucketmin_preview.__large_preview

If you are a fan of beautiful dashboards and admin panels, then BucketAdmin might be a good choice for you with plenty of carefully selected javascript controls and plugins. Beside that, BucketAdmin’s documentation and clean structure will help you to implement it without a lot of pain. Purchase BucketAdmin today for $21 only from http://bit.ly/1e9TtGP.

Here is a collection of a few cool features of BucketAdmin

BucketAdmin Features

WordPress Plugin Boilerplate Code Generator from Tom Mcfarlin's Plugin Boilerplate

Tom Mcfarlin has written an excellent boilerplate for plugin developers. It is very easy to start writing your own plugins using his boilerplate. But if you want to personalize it to YourPluginName, you will have to modify all these files and replace hardcoded variables and class names which is a real pain in the ass.

So I have created a code generator which takes Tom Mcfarlin’s repository and replace everything (wherever necessary) by your plugin name, author name etc and personalize it so that you can download and start using it right away.

Check out this code generator at http://codegen.kickapz.com

You can download the source code of this code generator at https://github.com/hasinhayder/plugin-boilerplate-code-generator

Writing a new plugin is now painless πŸ™‚

Create personalized phar files in PHP

Created a screencast to show how you can create phar files, most importantly personalized phar files to store some information inside it and protect it using user’s password. Those information is usable only when user providers a correct password.

For packaging, I used http://box-project.org which is an excellent phar packager. I’ve also used two functions from Josh Hartman’s blog to encrypt and decrypt data using Rijndael algorithm.

www.youtube.com/watch?v=V-1NgA5T4Bw

How to create a page and assign a page template automatically in WordPress

Sometime your theme depends on a few special pages, and it’s better to create them automatically after theme activation. You could also ask your users to create these pages and assign a few specific page template, but why would you do that if there is a scope of doing it automatically from your theme. Here is a simple snippet to take care of that πŸ™‚

Step 1: Create a page template in your theme (say awesome-page.php) which has the following code
[sourcecode language=”php”]
<?php
/**
* Template Name: Awesome Page
*/
[/sourcecode]

Step 2: Add the following code in your theme’s functions.php file πŸ™‚

[sourcecode language=”php”]
add_action(‘after_setup_theme’, ‘create_pages’);
function create_pages(){
$awesome_page_id = get_option("awesome_page_id");
if (!$awesome_page_id) {
//create a new page and automatically assign the page template
$post1 = array(
‘post_title’ => "Awesome Page!",
‘post_content’ => "",
‘post_status’ => "publish",
‘post_type’ => ‘page’,
);
$postID = wp_insert_post($post1, $error);
update_post_meta($postID, "_wp_page_template", "awesome-page.php");
update_option("awesome_page_id", $postID);
}
}
[/sourcecode]

And you are done!

My $4/year continuous deployment server using webhook and rsync

Anthony Smith is running an interesting project called Low End Spirit where he sells low end servers for $4/year and these servers comes with 128Mb ram and one core of Xeon X3440 cpu @2.53GHz and 500GB bandwidth. And most interesting thing is that they comes with 5 IPv6 addresses in multiple locations. LowEndSpirit is pretty famous for their amazing service.

So I purchased one of these servers a week ago, and converted into a simple continuous integration server and trust me, it’s running just amazing. Here is what I did πŸ™‚

1. I pointed one of my domains to this LowEndSpirit server (Lets call it LES Server) using cloudflare’s free IPv6 to IPv4 proxy, http://forum.lowendspirit.com/viewtopic.php?id=441

2. Once the domain is working, I created one php file in my LES server. This php file is working as the webhook endpoint. Lets assume that this file url is http://example.com/webhook.php so that we can refer to it in the rest of this article. The only thing this webhook.php file is doing is creating a file in the /tmp directory, for example /tmp/hook.txt

3. I created a ssh key using “ssh-keygen -t rsa” command in my LES server, and copied the content of the public key (~/.ssh/id_rsa.pub) generated by this command. Don’t use a passphrase when you create this key. Now I went to bitbucket/github and added this public key as deploy key (Here’s how to set it up in Bitbucket and in Github). This makes sure the readonly access of this key, that is very important from the security pov that you use a deployment key. Now in my LES server I checked out my repository. Lets consider that I checked out at /path/to/my/repo

I have also add the URL of this webhook php file to the bitbucket/github’s hook/webhook section. This makes sure that whenever I push code, bitbucket/github will make and HTTP POST call to this webhook php.

4. Now copy the content of your public key (~/.ssh/id_rsa.pub) in your LES server, and add it in your Remote Project server’s authorized keys file (~/.ssh/authorized_keys). If you are concerned about security then you may also chroot, but that’s not essential. Once this LES server’s public key is added in your Remote Server’s authorized key section, the connection will be smooth.

5. I wrote a simple bash script which checks if there is any file named hook.txt in /tmp directory in my LES server. If it is found then it ‘git pull’ the repository and perform an rsync which updates my project code folder in the remote server, and then remove this /tmp/hook.txt . I saved this shell script to /path/to/shell/script.sh . Here is the content of the bash script. Don’t forget to give it executable permission by “chmod +x /path/to/shell/script.sh” command

[sourcecode language=”shell”]
#!/bin/bash
if [ -f "/tmp/hook.txt" ]; then
rm -f /tmp/hook.txt
cd /path/to/my/repo
git pull
rsync -rltuvh /path/to/my/repo/ [email protected]:/remote/path/of/the/repo/
echo "Done"
fi
[/sourcecode]

6. Now the final step is registering a cronjob. You can register a cronjob by invoking “crontab -e” command in your terminal window. So I went ahead and registered this cron job in my LES server.

[sourcecode language=”shell”]
*/5 * * * * /path/to/shell/script.sh > /tmp/cron.log
[/sourcecode]

It runs every five minutes and if the /tmp/hook.txt is found it update the local repository by “git pull” and rsync only the updated files. My project folder in remote server is instantly updated πŸ™‚

The server and service is running just great. Honestly, that’s a huge service running by a $4/year server πŸ™‚

By the way this is more of a Continuous Deployment in true sense, just fyi!